The Giant’s Awakening: First Steps and Major Surgery
Every great project begins with a first step. In our case, it was opening the TV and confronting the reality: an interior full of dust and a more limited space than it seemed.
Preparing the Canvas: A Thorough Cleaning
Before any surgery, you have to sterilize. Armed with brushes, isopropyl alcohol, and patience, we gave the TV a deep cleaning, restoring its dignity and preparing it for its new life.
The Ultimate Tetris: Fitting the Motherboard
The first major engineering challenge was to integrate the «brain» (the motherboard) into the «body» (the case). Despite the size of the TV, the huge cathode-ray tube occupied almost all the space.
The Plan: Place the board on the top, using the ventilation grilles to screw it in.
The Problem: The case was curved, preventing the board from sitting flat.
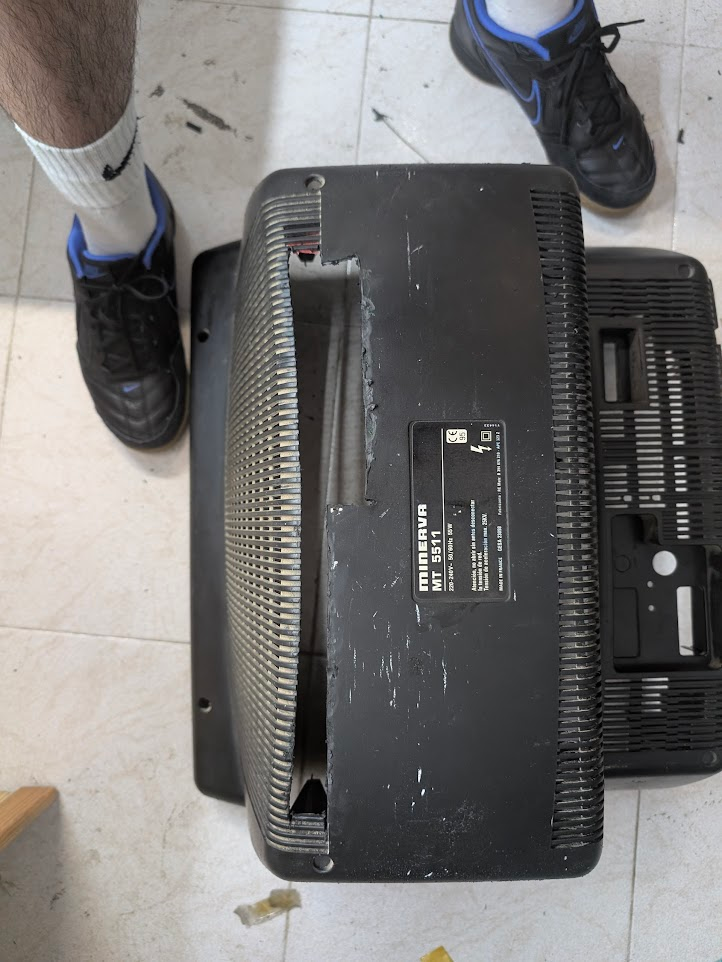
The Surgical Solution: Dremel to the rescue! We made two strategic cuts in the back. The first was so the board could be straight, and the second was to leave the USB and network ports accessible from the outside.
The following diagram illustrates our cutting strategy.
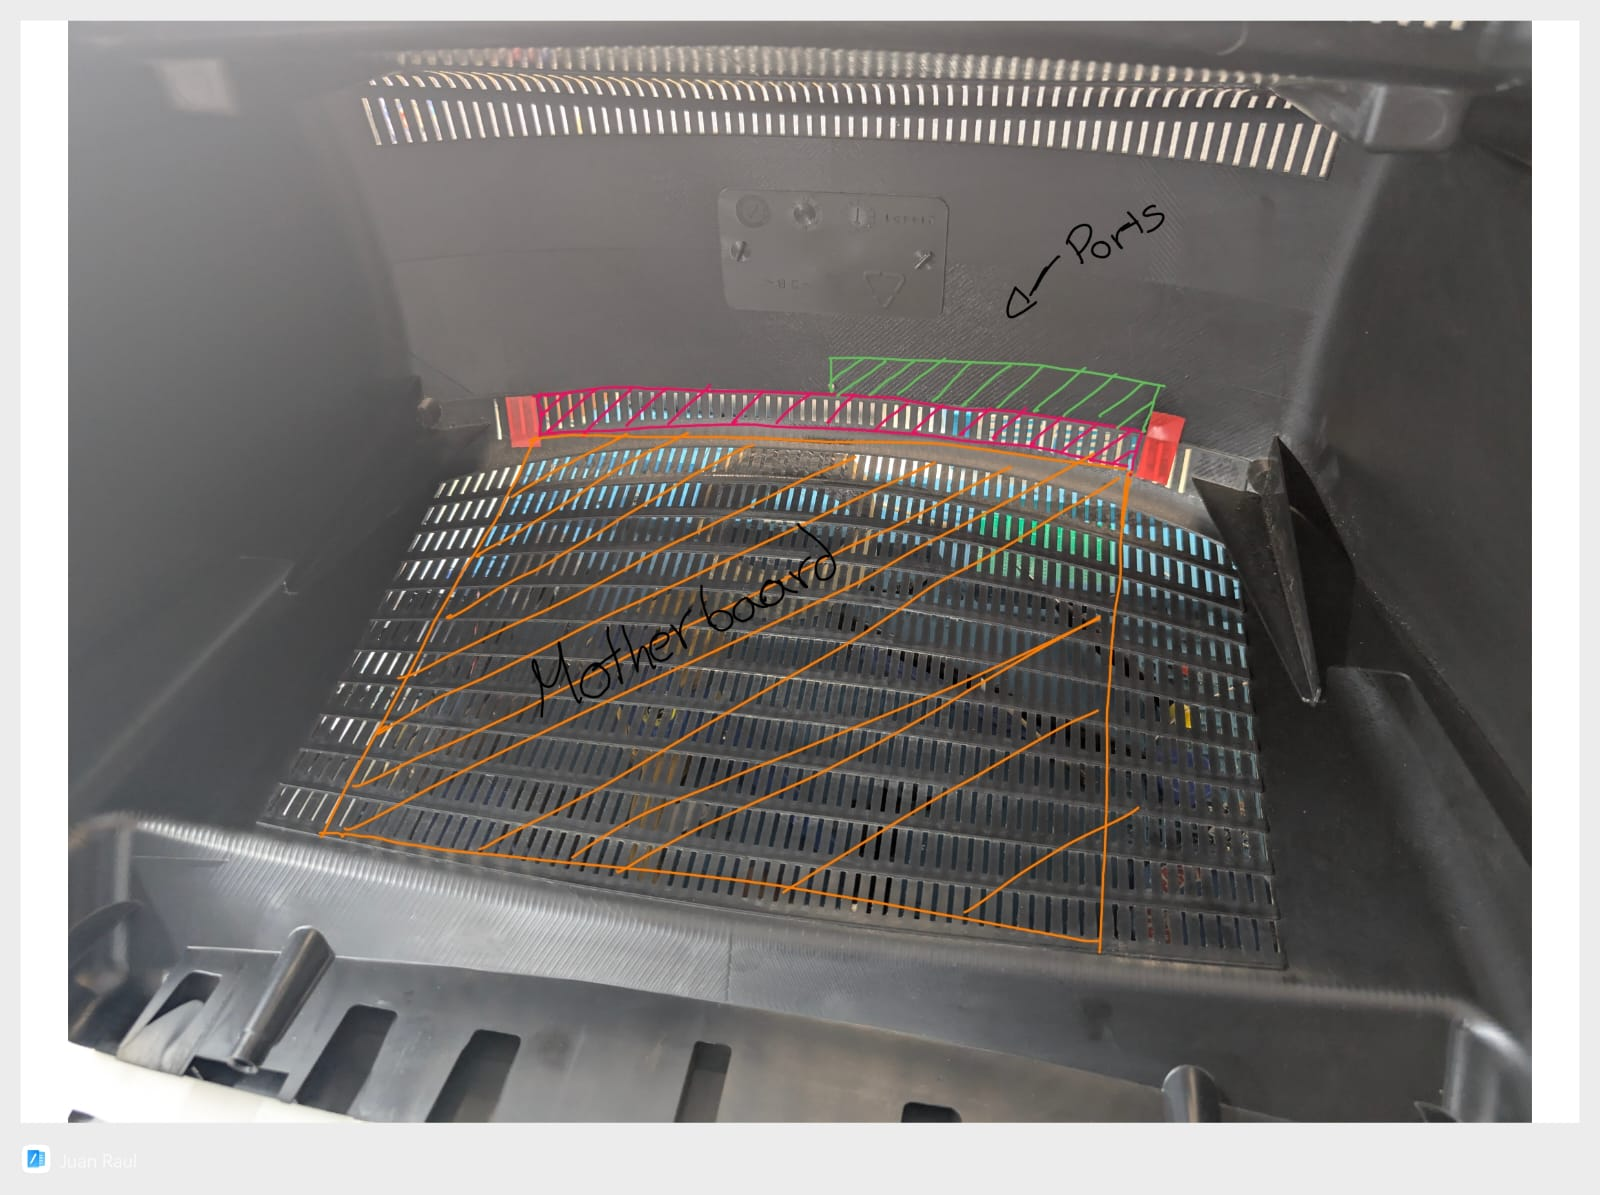
In this next image, we see the cutouts made in the TV case:
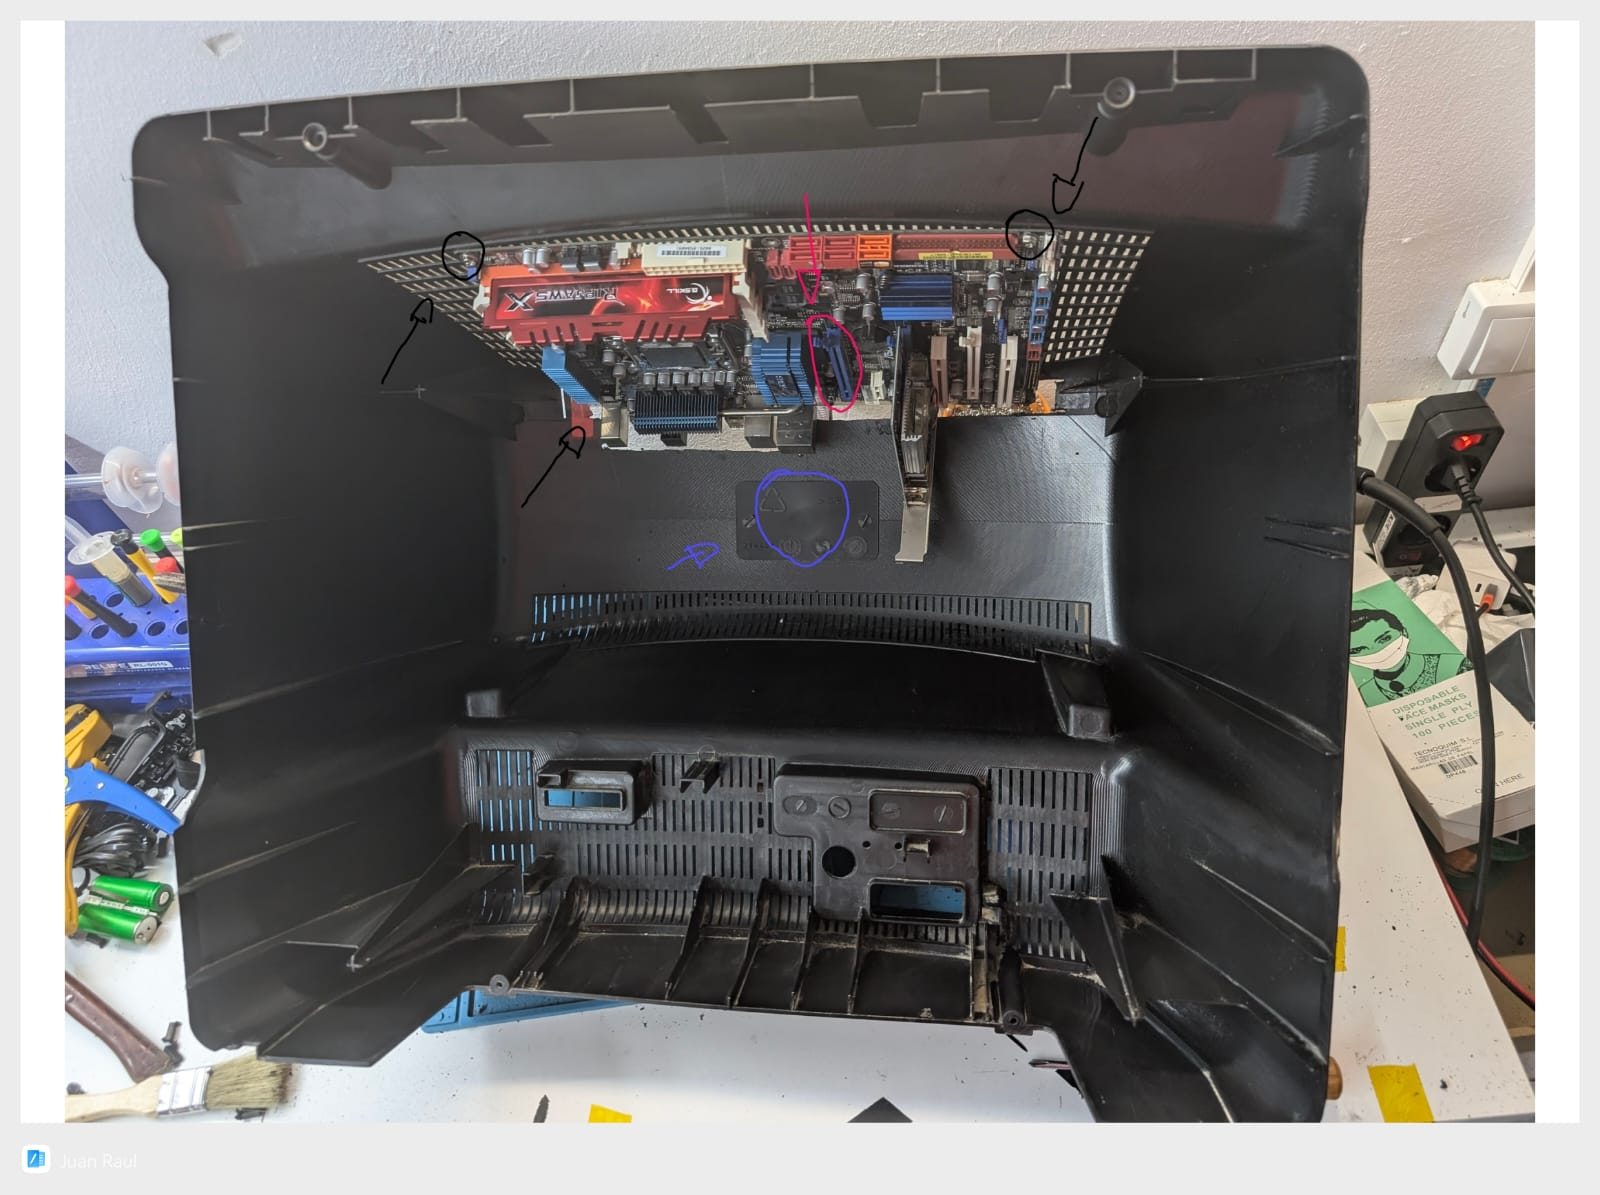
With the cuts made, we proceeded to install the motherboard. The following image shows the final assembly and some important details:
Fastening points (black circles):
Front: We used two existing holes in the case to screw the board down.
Back: As a temporary solution, we used a cable tie to secure the back part.
Conflict with the PCI port (pink arrow):
We ran into a problem: one of the PCI ports collided directly with the end of the TV tube (marked in blue).
To solve it, we simply used the other available PCI port to install the graphics card.
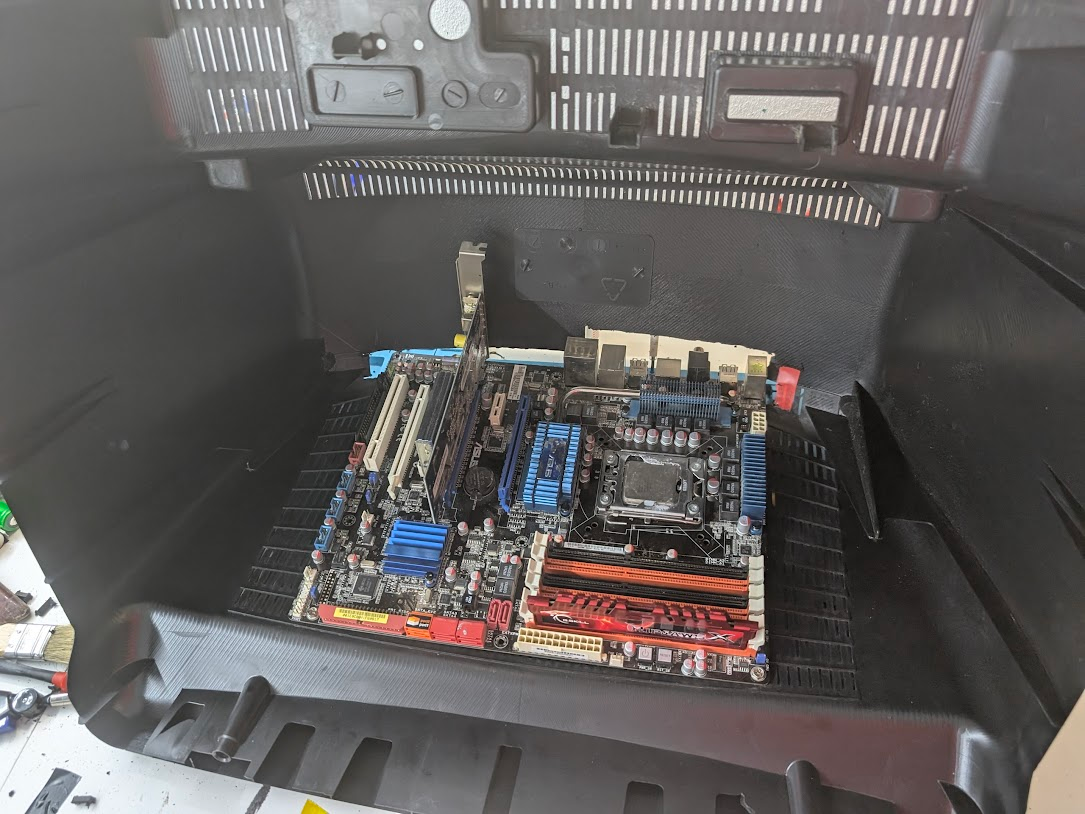
The next image is similar to the previous one but with the case lying down, where everything can be seen better.